
What Is a Ghost Mannequin? The Effect Explained
What a ghost mannequin (invisible mannequin) photo is, why clothing stores use the effect, and three ways to make it: Photoshop, a service or AI.
Last updated:
A ghost mannequin photo shows a garment as if an invisible person were wearing it. The clothing keeps its three-dimensional shape: the shoulders are filled out, the sleeves hang naturally and you can see into the neck opening, where the inside back of the collar shows. But there is no mannequin, model or hanger in the picture. The same style is also called the invisible mannequin, hollow man or 3D effect.
The effect is common on fashion stores because it sits between the two other standard product views. A flat lay shows the garment from above but loses its worn shape. An on-model photo shows the fit but brings a person, a pose and styling into the image. A ghost mannequin image keeps the attention on the garment while still showing how it holds its shape on a body.
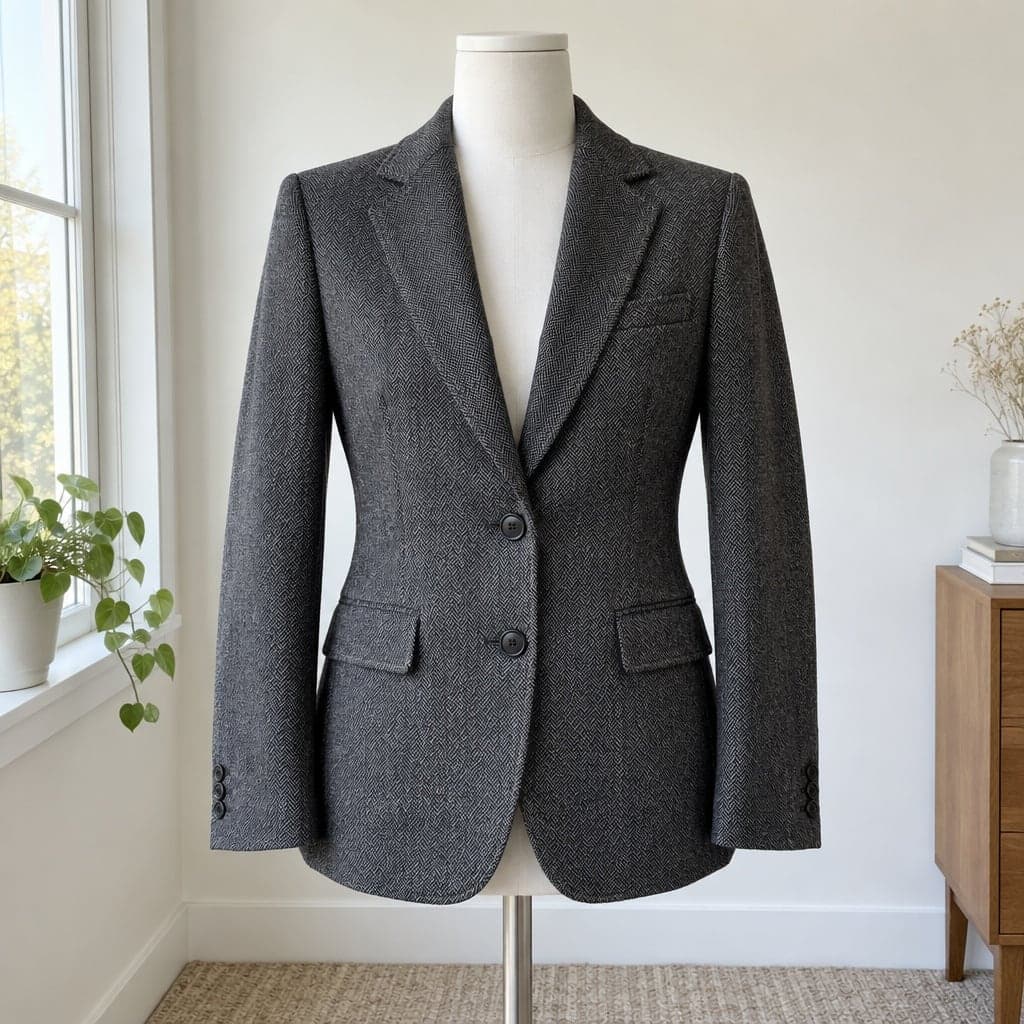 Mannequin
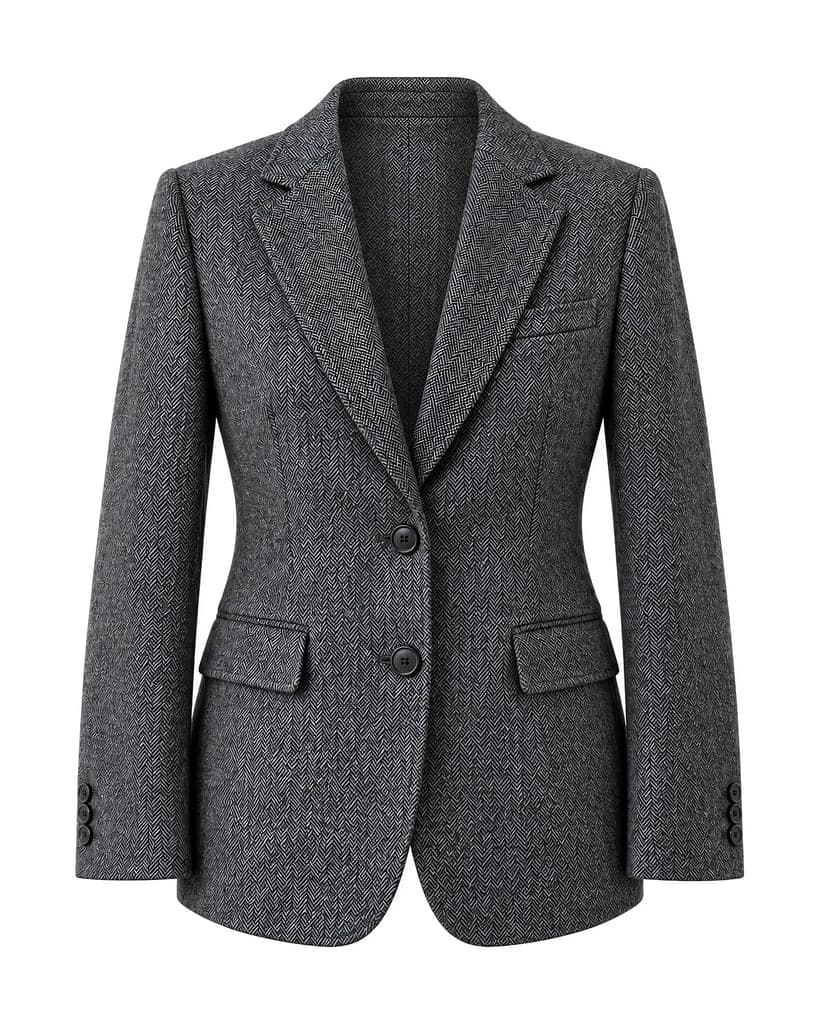 Ghost mannequin
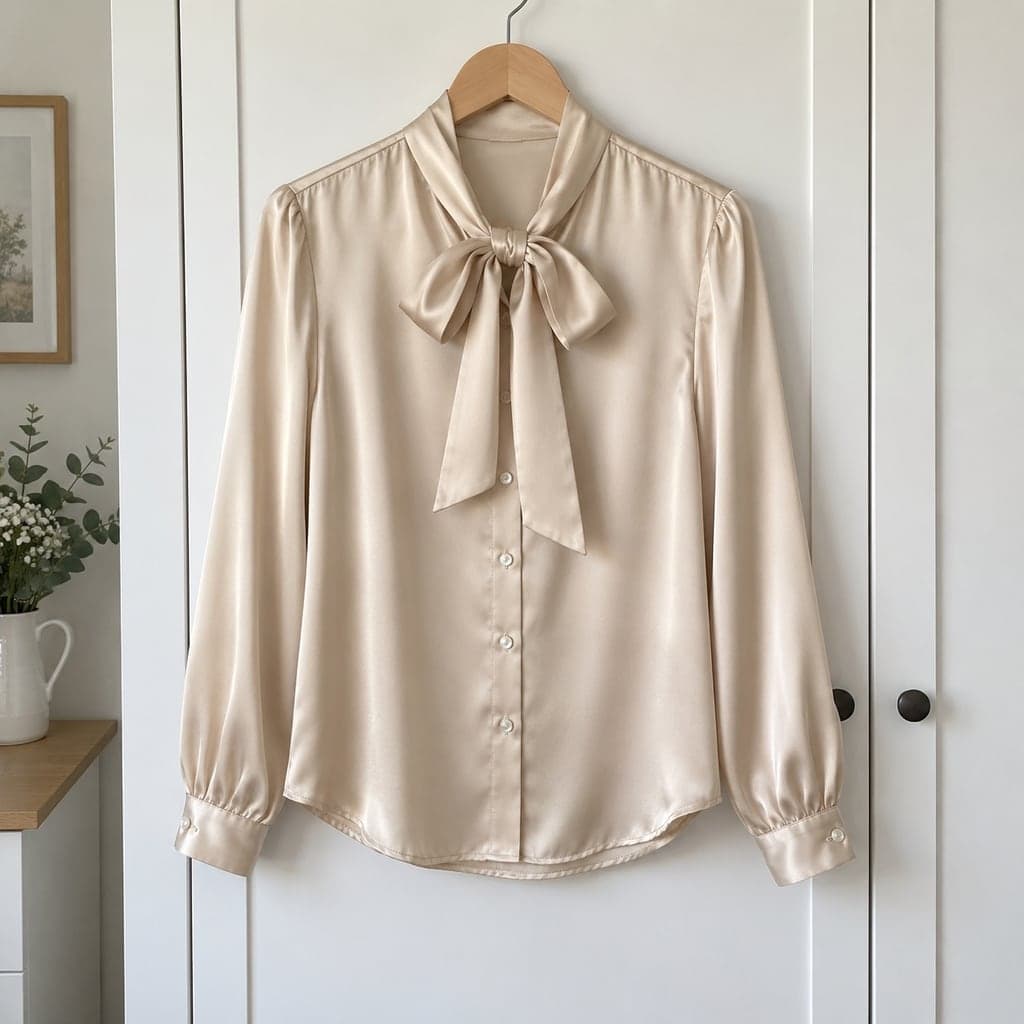 Hanger
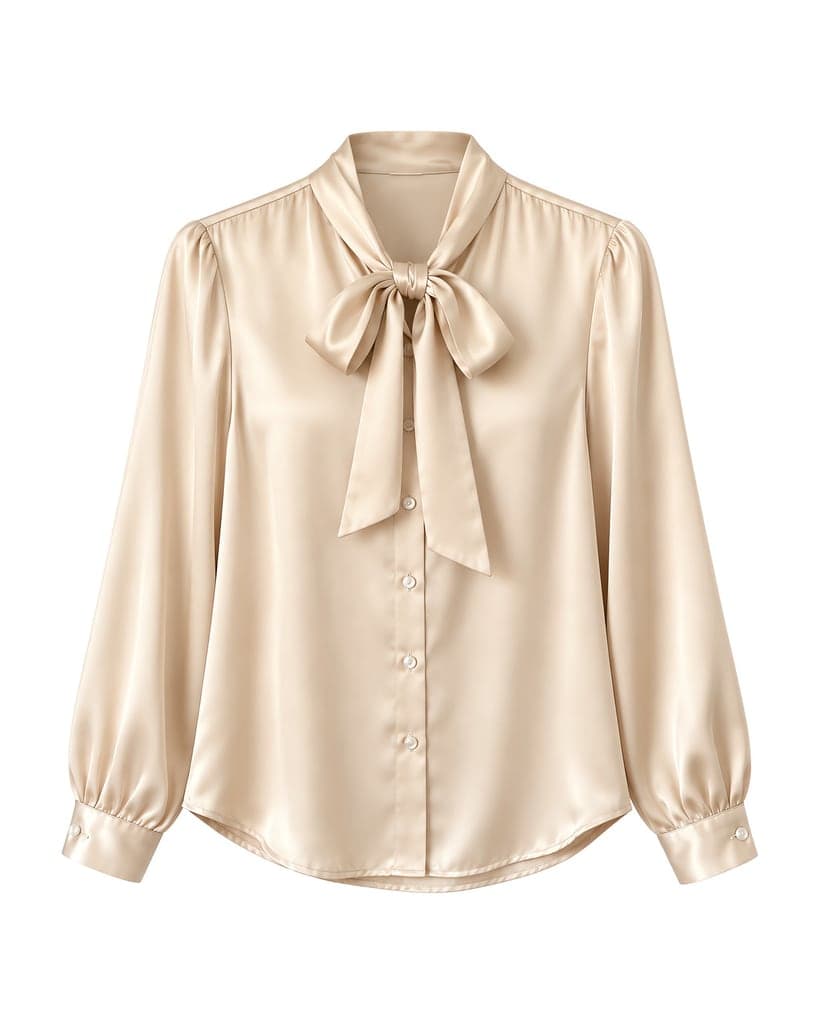 Ghost mannequin
What makes the effect work
Three details separate a convincing ghost mannequin photo from a garment that has simply been cut out of its background.
- The inner neck. When a mannequin is removed, its neck leaves a gap. In a finished image that gap is filled with the inside back of the garment, usually with the collar seam and often a label. This is the part most people notice first.
- A believable shape. The shoulders, chest and sleeves look worn, not flat and not stretched over a rigid form. A hanger photo, for example, needs its sharp shoulder corners rounded off.
- A clean outline. Nothing from the stand remains: no pole, base, hook or clip, and no shadow shaped like a mannequin.
If any one of these is missing, buyers tend to read the image as edited. A cut-out with an empty neck gap looks unfinished; a garment with a visible hanger hook looks like a home photo.
Why stores use ghost mannequin photos
Consistency across a catalog. Every product sits in the same position, at the same size, on the same background. A category page full of identical framings looks orderly and makes products easy to compare.
Focus on the product. There is no face, hairstyle or pose for the buyer to react to, and no styling that might suggest the item comes with other pieces. The garment's color, cut and details are the subject.
Shape without a model booking. The photo still shows how a jacket's shoulders sit or how a dress falls, which a flat lay cannot. Many stores pair one ghost mannequin view with detail close-ups and, where budget allows, an on-model shot. Our ghost mannequin vs flat lay guide compares the two non-model styles in more detail.
The effect is less helpful when the buyer's main question is fit on a body, such as swimwear or very fitted pieces. In those cases an on-model photo answers more.
Three ways to make the effect
1. Photograph and composite it yourself
The traditional method uses two photos of the same garment on a mannequin: one from the front and one of the inside of the neck, taken with the front of the garment turned away. In Photoshop, the mannequin is masked out of the first photo and the inside-neck photo is placed behind it, so the collar opening shows real fabric. It gives full control, but it needs a mannequin with removable parts, consistent lighting and editing time for every product. Our ghost mannequin Photoshop guide goes through it step by step.
2. Send the photos to an editing service
Retouching services do the same compositing for a per-image fee. You still need to shoot the garment properly, and the service needs both the outer and inner photos to rebuild the neck from real fabric. Our service vs AI comparison looks at published prices, photo requirements and when a human editor is the better choice.
3. Generate it with AI
An AI tool can work from a single photo: the garment on a mannequin, on a hanger or laid flat. The model removes the stand or hanger, gives the garment a worn shape and draws the inner neck. That is what our ghost mannequin generator does, with a choice of white or light gray background, aspect ratio and spacing.
The trade-off is that anything the camera did not see is generated, not recovered. The inner neck in particular is drawn by the model, and it can add a label your garment does not have. Colors, prints and small hardware can also shift. Every AI result needs to be checked against the real garment before it goes into a listing, and our tool flags a likely invented neck label so you can look closely.
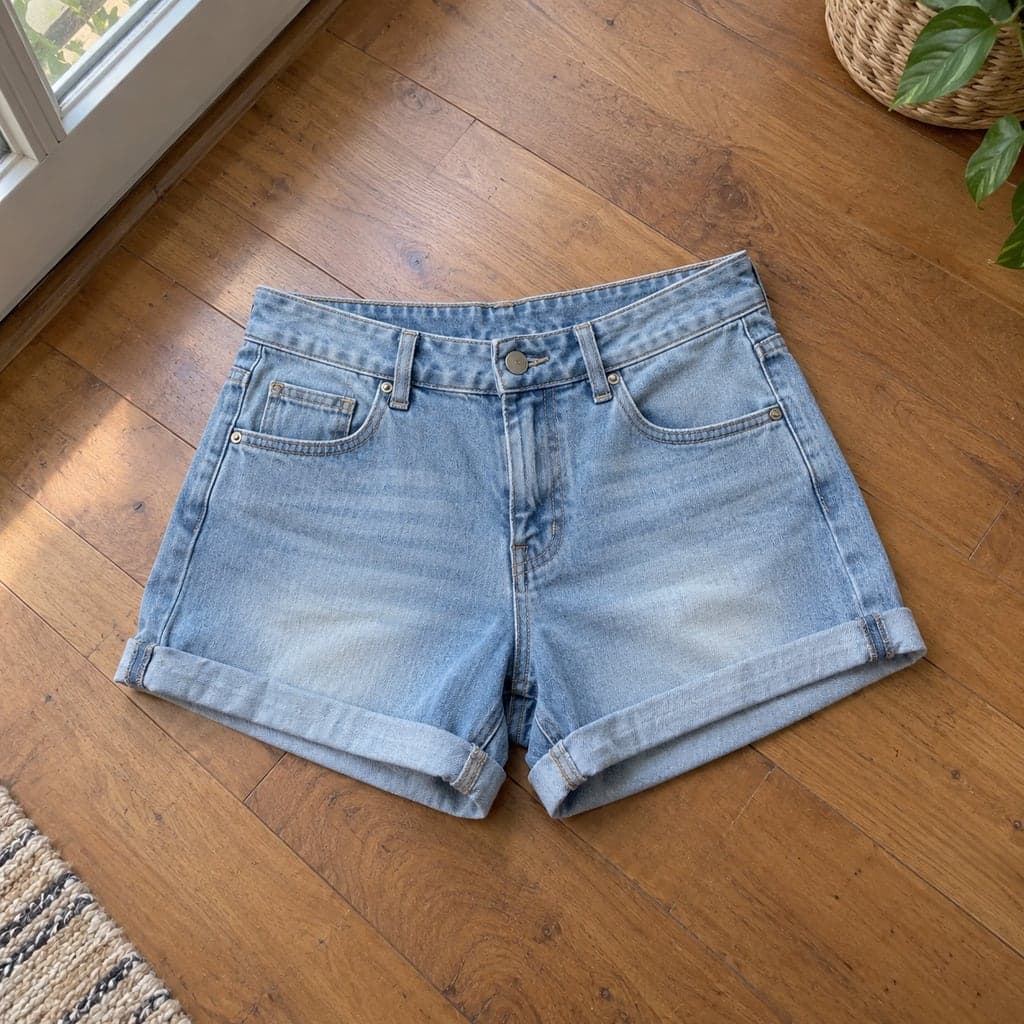 Flat lay
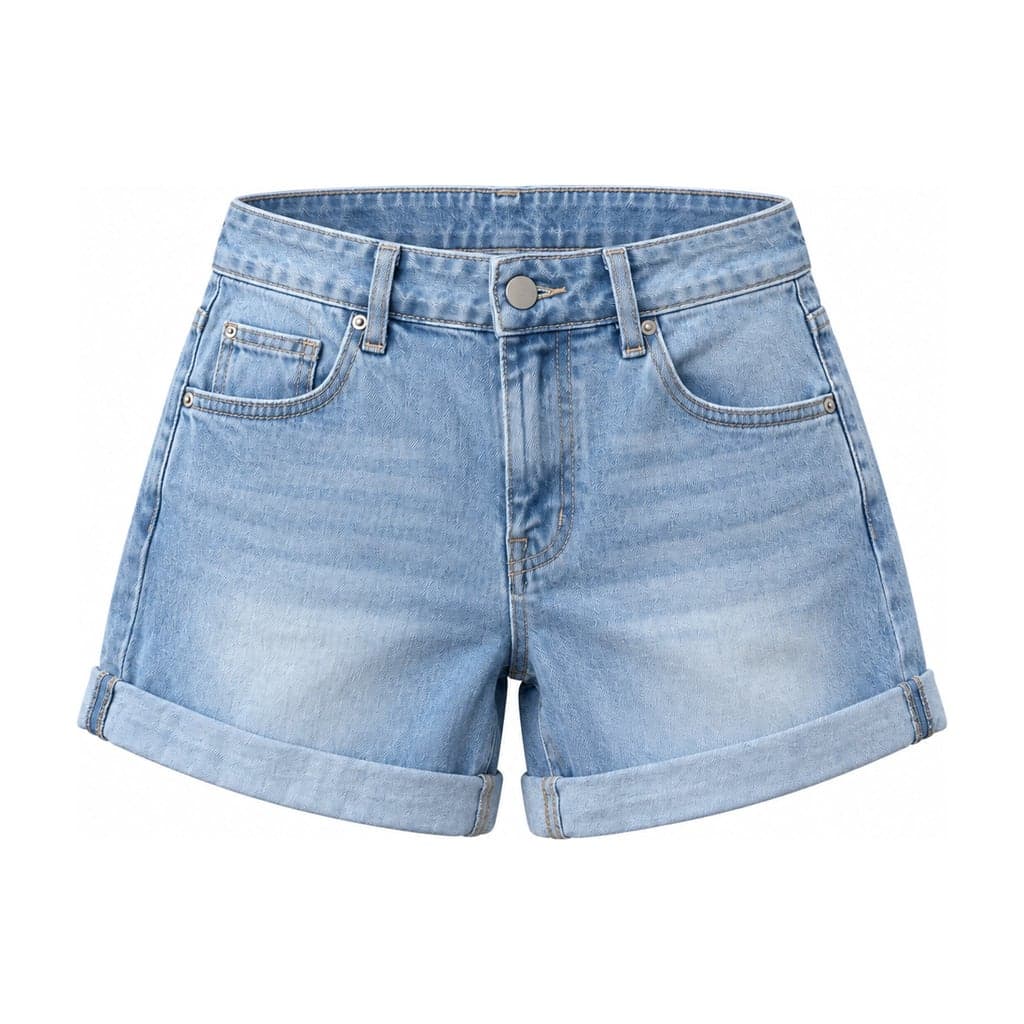 Ghost mannequin
Which input photos work best
Whatever method you choose, the starting photo matters more than any edit. Shoot the garment straight on, in soft even light, with the whole piece in frame and nothing covering it. Steam out creases first; editing does not remove them convincingly. For a mannequin, choose one close to the garment's size so the fabric is not pulled or baggy. For AI, a mannequin or hanger photo usually keeps the shape closest to the real garment, while a flat lay gives the model the most to infer.
Our guide on ghost mannequin photography covers lighting, camera position and garment preparation for each kind of input.
Questions sellers ask
Is a ghost mannequin the same as an invisible mannequin? Yes. Both names describe the same effect. "Invisible mannequin" is also the name of the physical stands with removable chest and neck pieces that photographers use for the traditional method.
Does the effect misrepresent the garment? It should not. The shape suggests how the piece looks when worn, but the color, print, length and details must match what you ship. If an editor or AI changes any of those, fix it or use another photo.
Can I make a back view? Yes. Back views do not need an inner neck, because you would not see one from behind. In our tool, choose Back as the side of the garment.
Related reading
Learn how to photograph clothes for the effect, see what clothing photography costs, or compare ghost mannequin and flat lay.